
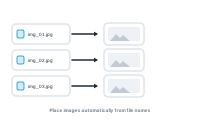
When every record needs its own image – a product photo, a portrait, a logo – DataMergeStudio places the right file on each record automatically, using a reference in your data. You set it up once and it runs for 10 records or 10,000.
The frame that should receive the images must contain a placeholder as its only content – for example {{image}}. Nothing else may sit in that frame, or it won’t be recognized as an image target.

In DataMergeStudio, click the question mark on the field and choose Replace with image. This tells the app you want to merge images into this frame.

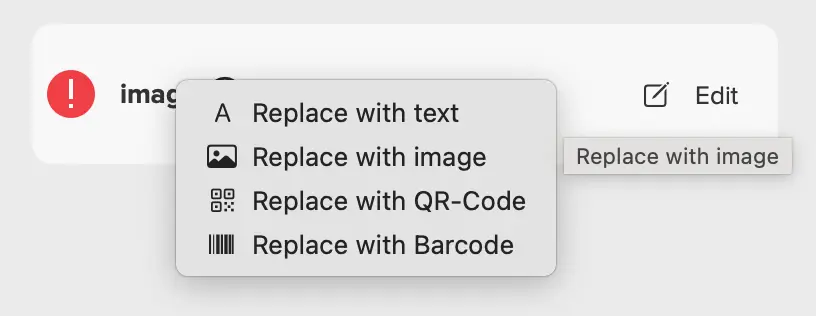
Then click Edit to open the editor workspace.
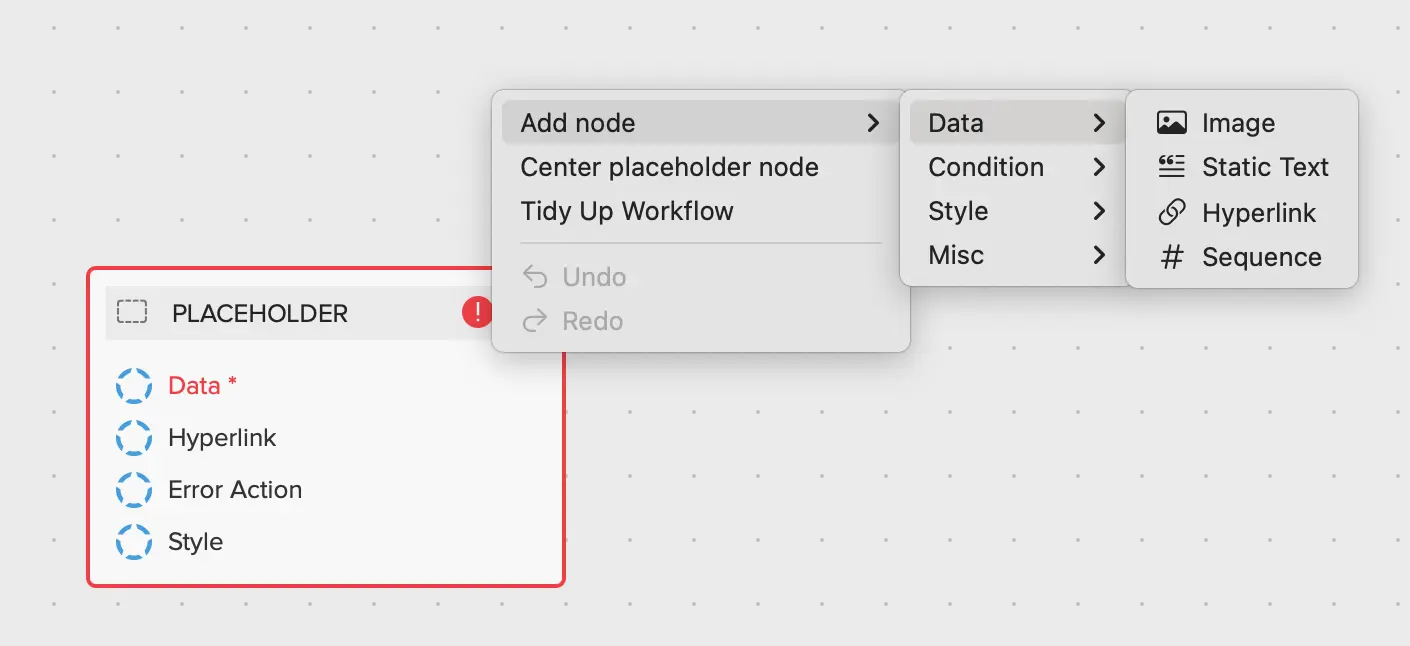
In the editor, right-click the canvas (or click the large + in the top right) and choose Add node → Data → Image. Click the new node to open its Properties panel on the left.
In the Properties panel, under Image Source, open the first dropdown and select the column from your datasource that holds the image reference.
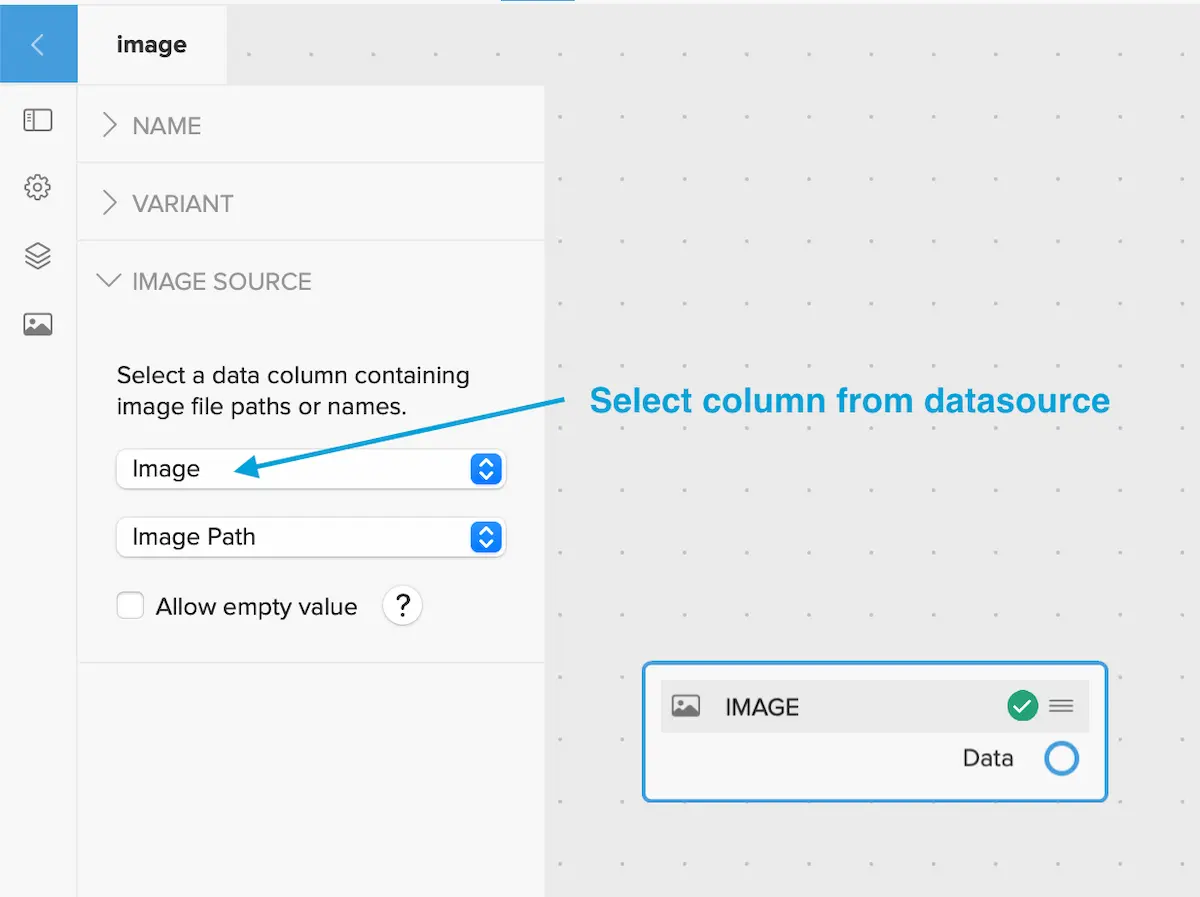
From the second dropdown, choose how the reference should be read:
12345.jpg).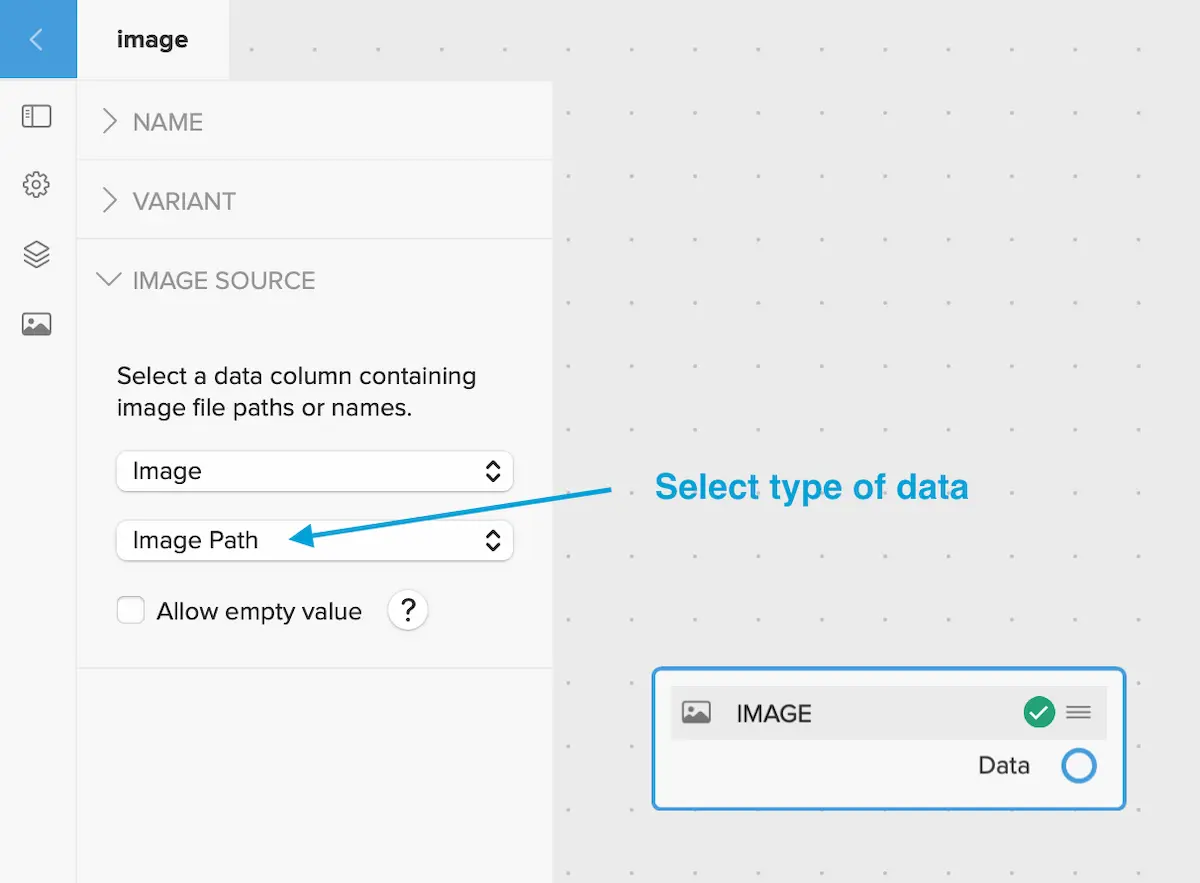
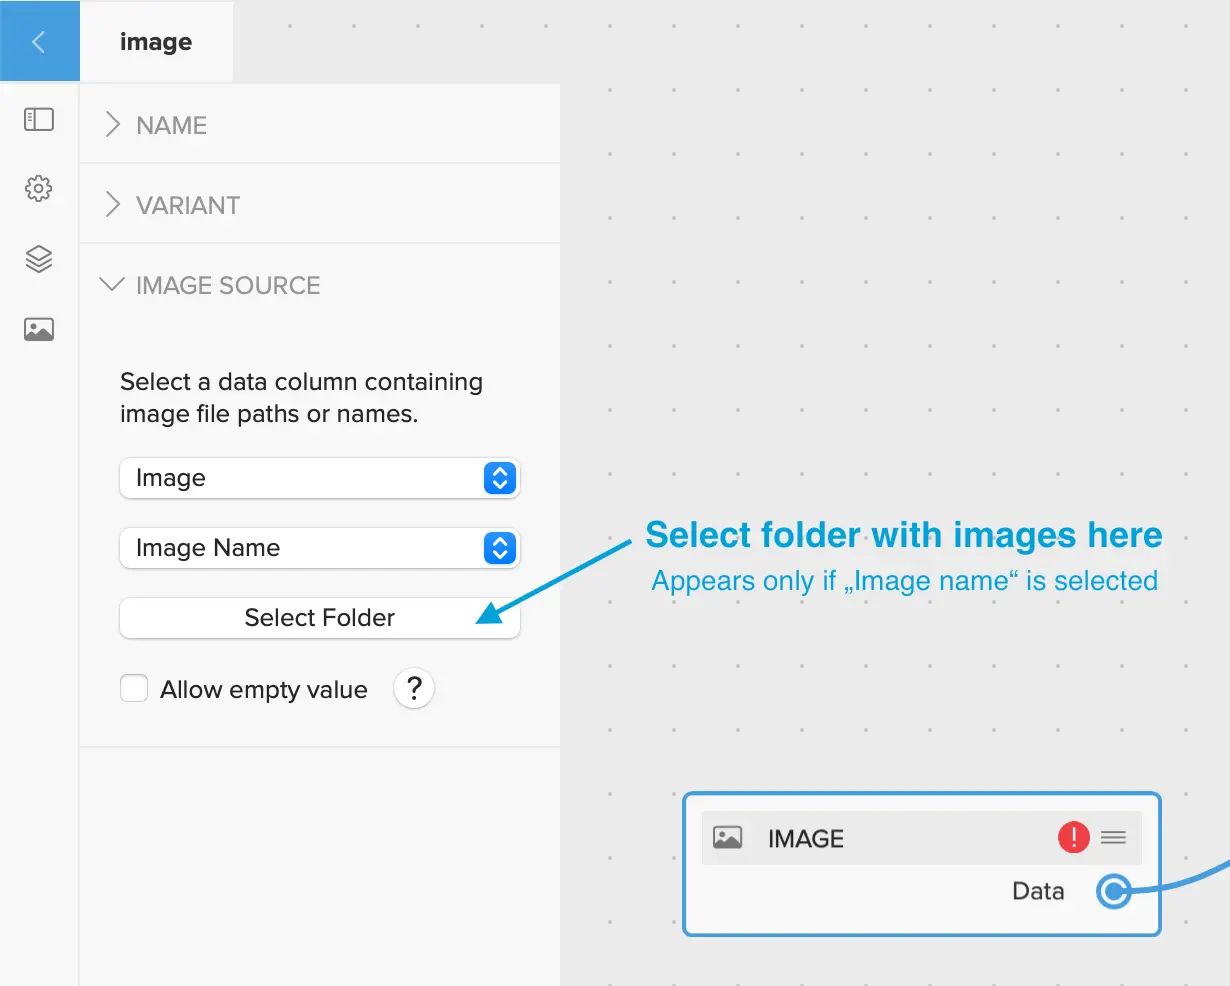
If you chose Image Name, a Select Folder button appears. Click it and choose the folder your images live in – often the InDesign Links folder.
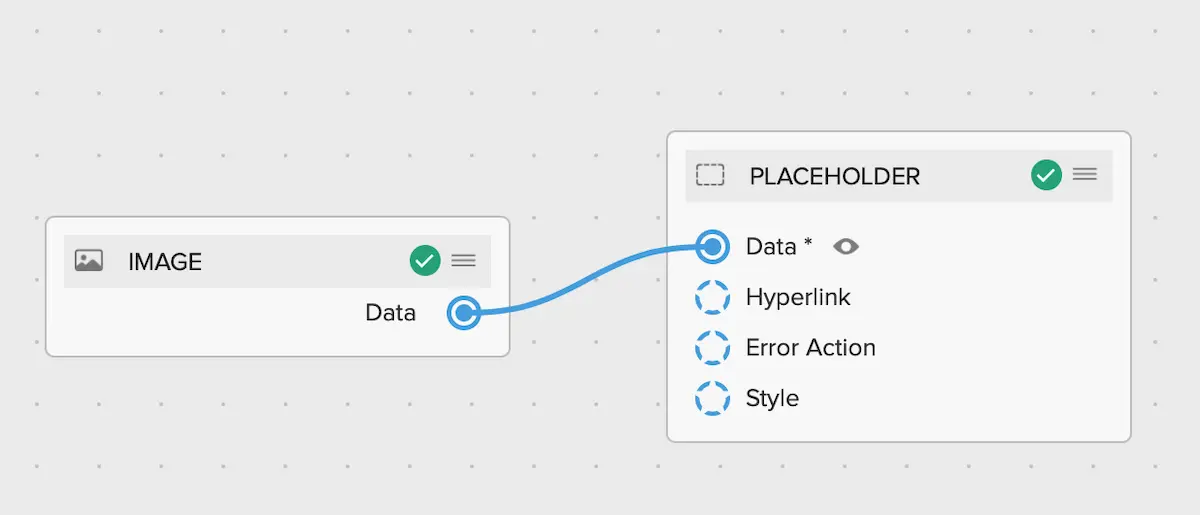
Drag from the Image node’s Data output to the Data input on the central node (labelled PLACEHOLDER). The central node is always present and can’t be deleted.
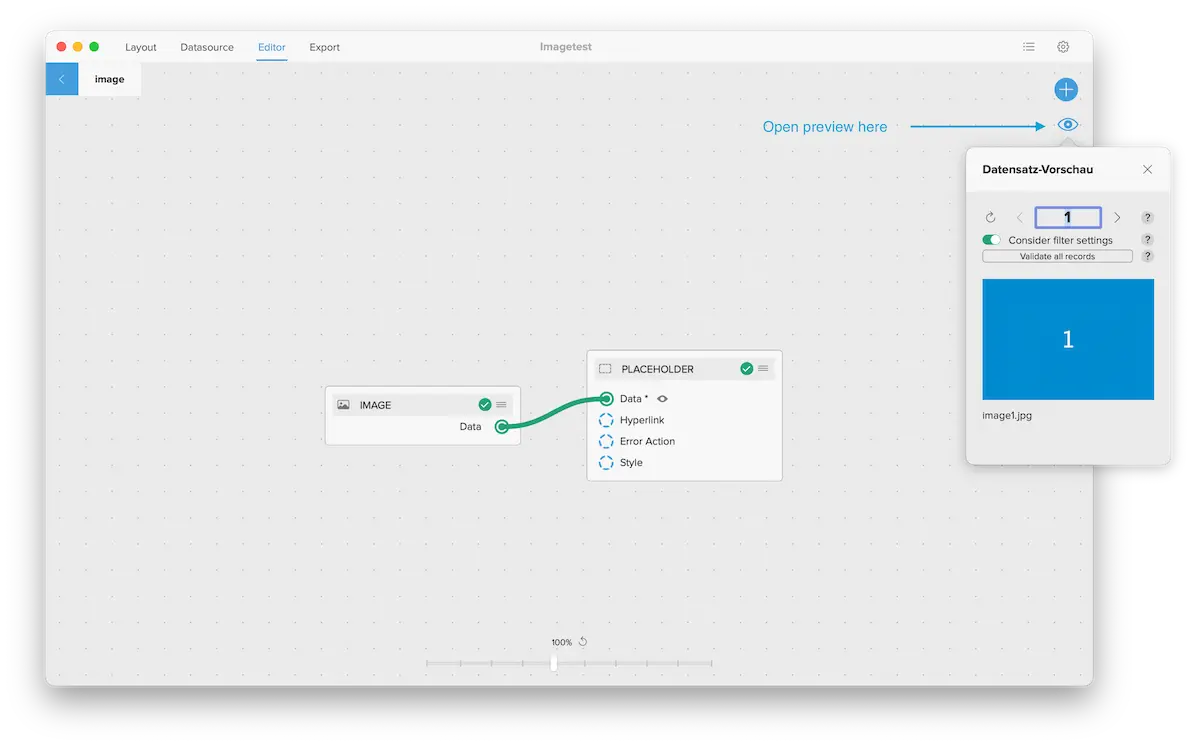
Open the Preview with the eye icon in the top right and check that the images appear. You may need to grant permission the first time.
Click Validate all records – the button in the bottom-right corner of the workspace. DataMergeStudio checks the setup against every row and tells you how many succeeded – and warns you if an image is missing, can’t be downloaded, and so on.
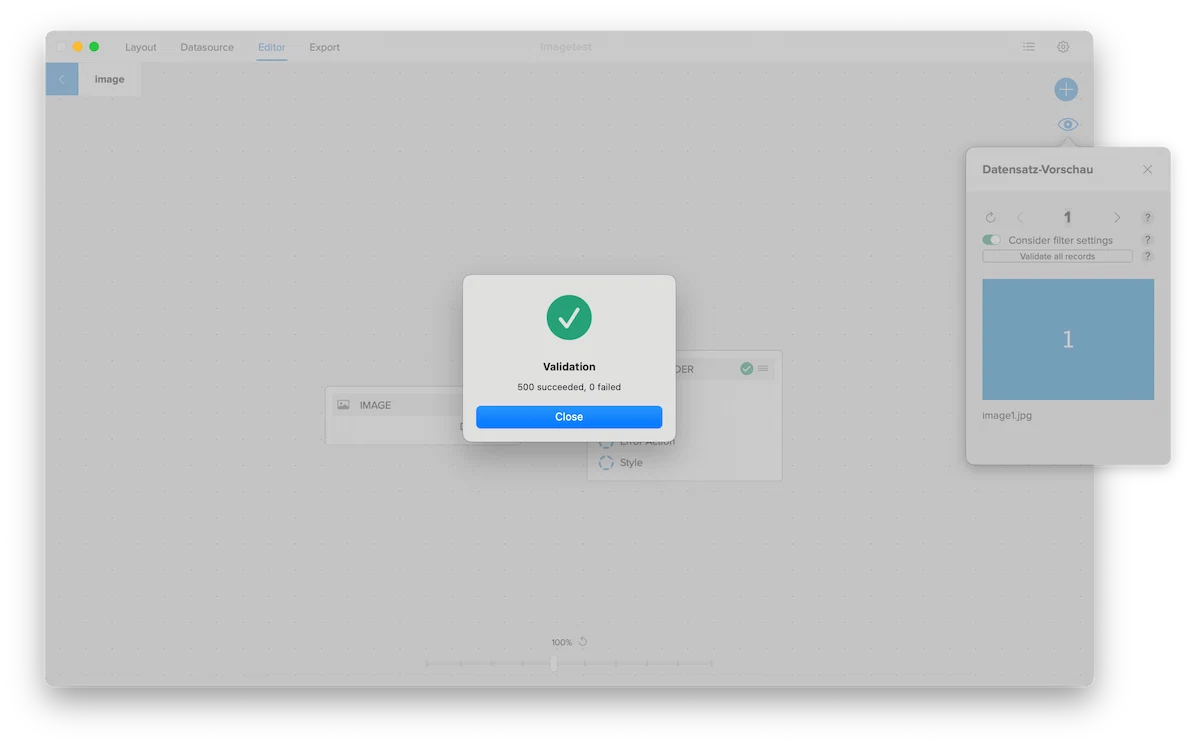
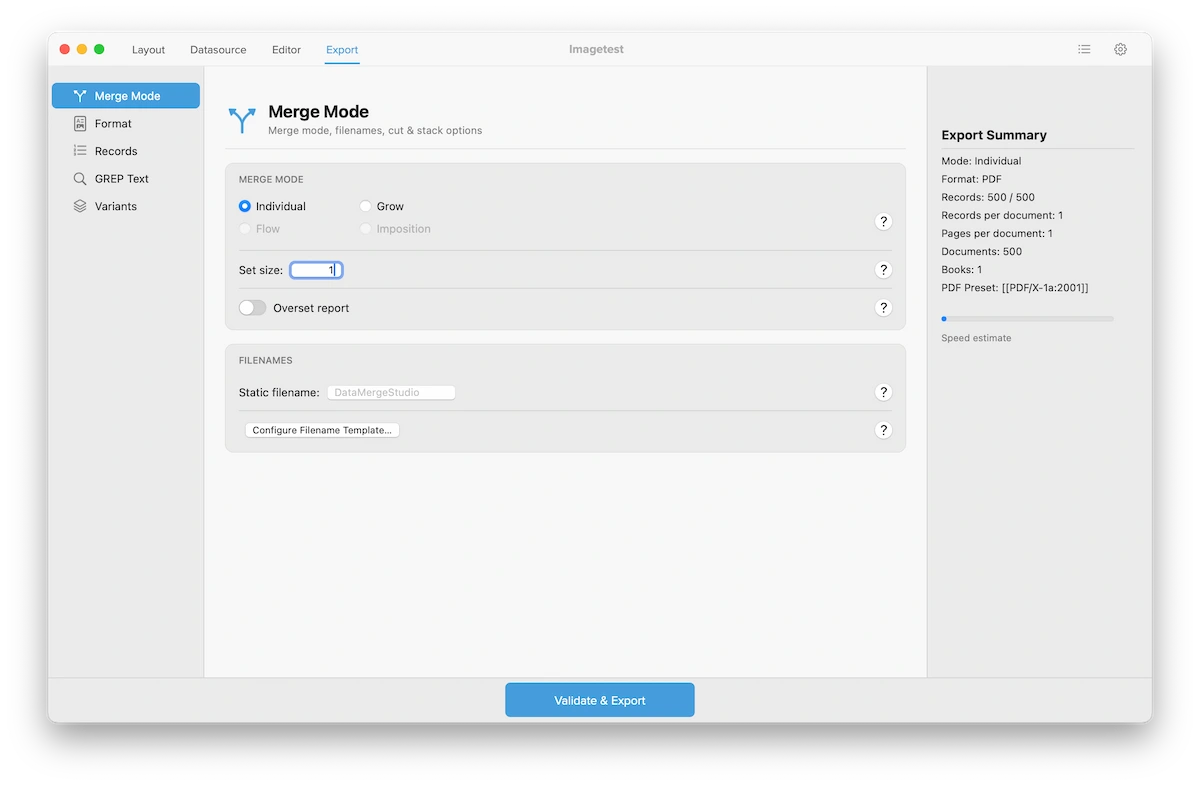
Open Export from the top menu. Under Merge Mode, select Individual, then click Validate & Export. Every record is exported with its own image in place.
How each image sits in its frame is up to you. DataMergeStudio supports all of InDesign’s image fitting and alignment options – fit content to frame, fill proportionally, fit frame to content, centre, align to an edge, and so on – set per frame. The chosen fitting then applies automatically to every record’s image, and it can even be driven by your data, so different records fit differently. You can also apply an object style to the image frame for borders, effects, or a consistent look.
Every record places its own image automatically – no manual dragging, however many records you have.